Mass Effect Modding Tutorial: Creating Custom Meshes and Textures

Some of you have asked how to create custom meshes and textures. Well, you can create meshes and textures from scratch (but don’t ask me how, way out of my league!) or you can mish-mash existing meshes together to create a new look (this I can help with).
How to Create Custom Meshes
- You’ll need 3DS Max 2012 (or EARLIER – 2013 and beyond does not allow for ActorX plug-in compatibility!) or a similar game editing software. You’ll also need the ActorX importer.
- The easiest way for me to show you is to do an example. So, for this example, I’ll be giving Ashley’s T-shirt body some BDU pants.
- At this point, you should already know how to extract, edit, and replace meshes/textures. If not, go back to this page and read up on the whole tutorial!
- Open up 3DS Max and import the meshes you want to use. In my example, I’m importing the Ashley T-shirt mesh (what she wears in the hospital scene) and the BDU outfit (Shepard/Normandy Crew standard uniform). You can also import Ashley’s head to make sure there is no neck clipping, but I will leave it out for now for simplicity sake:
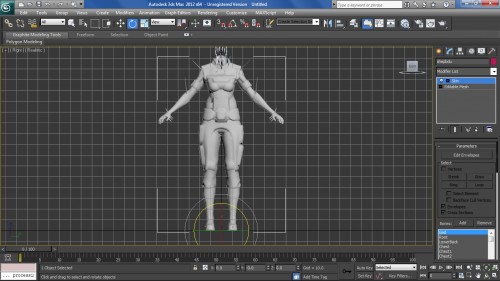
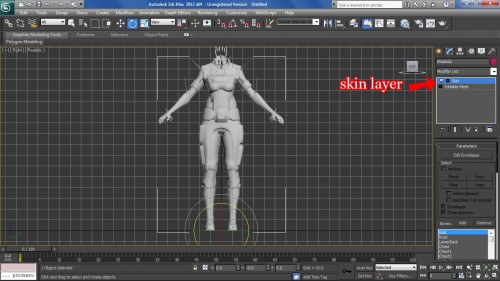
- You’ll notice that these meshes are one on top of the other. Good. Ok, now right-click and cut the skin layer in both the T shirt and BDU meshes so you can work freely with the meshes.
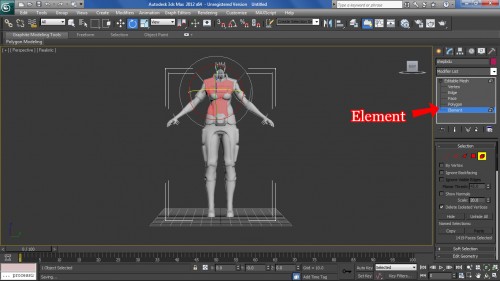
- Go to Editable Mesh > Element so you can click on each element of the mesh. The mesh will highlight red for the element you select. Delete all the elements you don’t want. In this case, I only want to keep the top of Ashley’s t-shirt mesh and the bottom of the BDU outfit (pants):
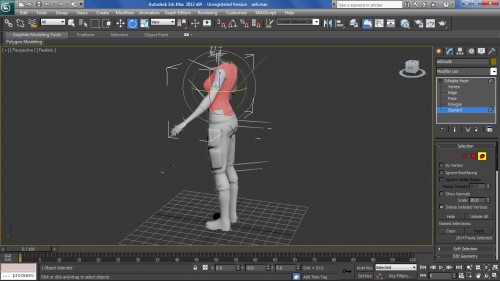
- When you’ve deleted all your unwanted elements, select the elements that overlap – in this case, Ash’s torso. Notice how it clips through the pants in the back:
- That’s no good. We want to edit the meshes so that they fit nicely with one another. So, select Vertex and use your mouse to pick the vertices you want to move. They will highlight red as you select them:
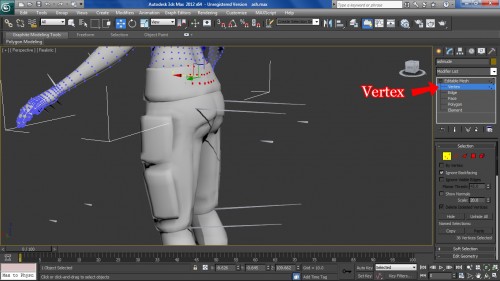
- Drag along the x, y, and z lines to reshape the mesh. It takes some artistry and time to get this right, but in the end, you should end up with something like this, where if you select the torso element, it no longer clips through the pants:
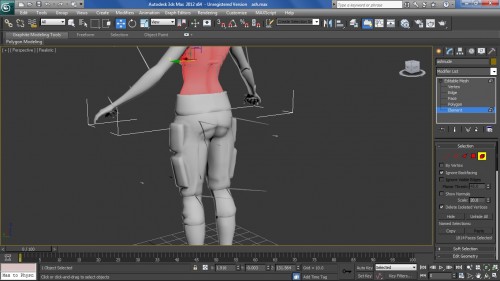
- Ok, looks great, right? It should look like this when nothing is selected:
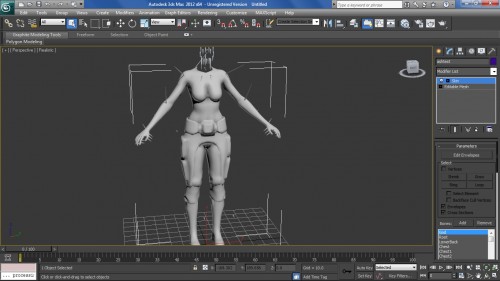
- Now paste back the skin into both the T-shirt and BDU Pants meshes and export the file as a .PSK … I do this because I like to work with the new mesh as a single entity rather than separately as the T-shirt mesh and the Pants mesh (there’s probably a better/easier way to do this, but this is what I do).
- Ok, create a new 3DS Max document and import the mesh you created (in my example, ashtest.psk).
- Time to add skin. The way I do this is just to import the mesh I’m replacing (in this case Ashley’s Casual Appearance tunic). It will load right in the same place as the mesh you just created:
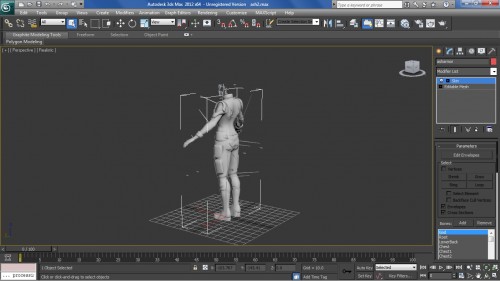
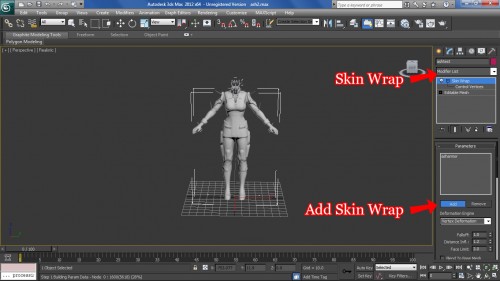
- Select the mesh you want to add skin to (ashtest in this example) and click on the Modifier List and select “Skin Wrap.” Click on “Add” and select the mesh you’re replacing (in this case, the Ashley tunic mesh). You should see it added to the box:
- Now scroll down and check the “Weight All Points” box and push the “Convert to Skin” button:
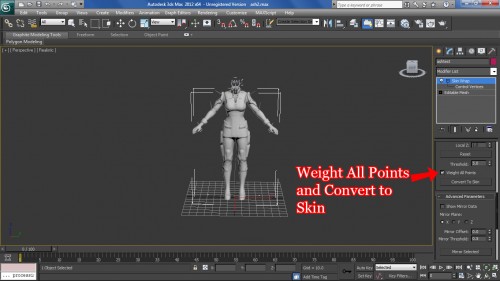
- That will create a new Skin layer. You can now delete the Skin Wrap layer.
Now, it’s time to texture your mesh!
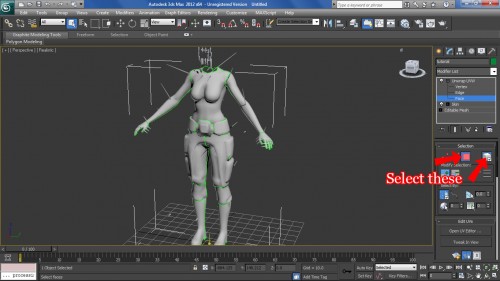
- Go to your Modifier List and select UVW Unwrap. You’ll want to check these boxes so you can select each piece of the mesh by element:
- Go to “Open UV Editor” to see the “unwrapped” mesh. It should look like this (a jumbled mess):
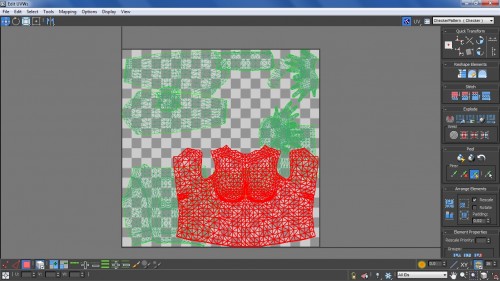
- Select each element of your mesh and the corresponding “unwrapped” piece will highlight in the UV Editor. Now move those “unwrapped” pieces around and rearrange them so that they’re nicely packed and not overlapping. Scale the pieces if they don’t fit (right-click, Freeform Gizmo should give you a box around the selected element that you can resize. Hold CTRL while dragging the corner of the box with your mouse to scale uniformly).
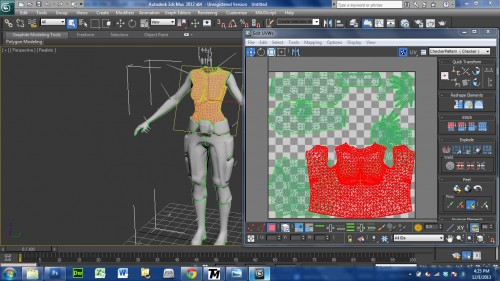
- In the end, you should have something like this:
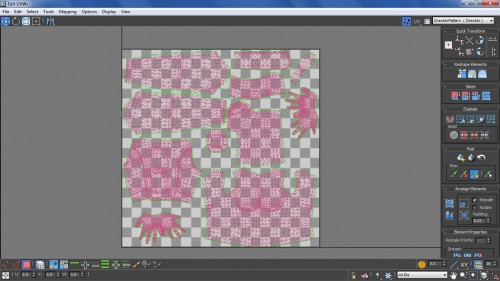
- Now you can export the UVW map by going to Tools > Render UVW Template …
- I like the following settings, but really it’s up to you:
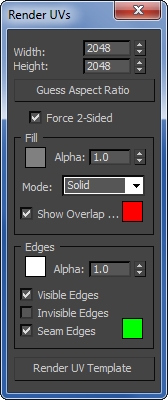
- Now click Render UVW Template button at the bottom and you should get this (a map of your mesh in 2D, essentially):
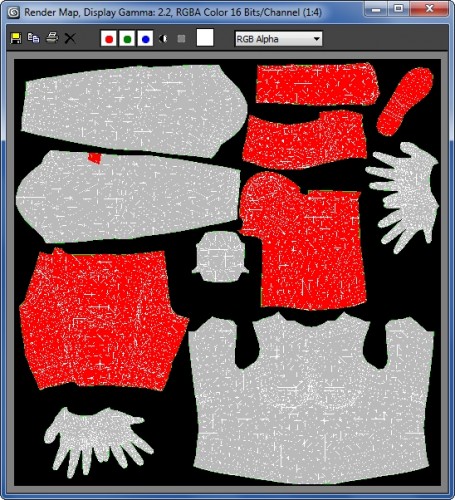
- Save it as .TGA somewhere you can find it.
- Export your mesh as a .PSK (it should have the skin layer and the new UVW Unwrap layer). Now you can convert it to .UPK and upload it into the game! (Forget how? Read the tutorial again!)
You’re done with the mesh … Now it’s time to create the texture for your custom mesh!
How to Create Custom Textures
- So, you have your UVW map now, right? Load that up into Photoshop or any other image editor.
- You’re using existing meshes, so find their corresponding textures in ME3 Explorer and extract them (just the diff file). So, in my case, I extracted Ashley’s t-shirt texture and the BDU outfit texture:
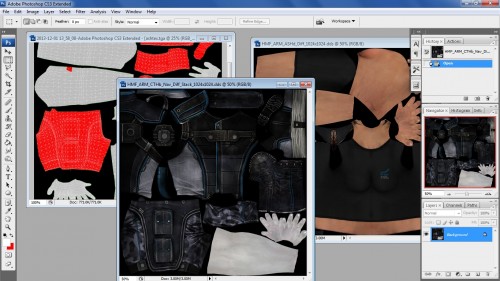
- Now, cut and paste the pieces of the textures you need over the UVW map (or make your own from scratch if you are feeling ambitious). Resize pieces as needed. In the end, it should look like this:
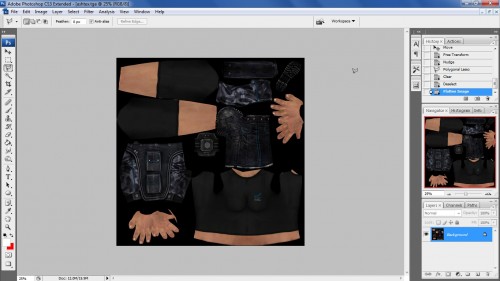
Great, you have a diff texture! You should already know how to create a spec and a norm from this file, so do it. Now, replace the texture in game using Texmod or manually using ME3 Explorer. Again, you should already know how to do this. If you don’t, go back and read the tutorial again!
And the end result is …
So, you’ve replaced the mesh and the textures. Open up the game and see what happens:
Well, it’s not perfect and it probably won’t be the first time. Pick out the errors you see in the game, whether it’s with the texture (skin is too dark) or the mesh (clipping around the neck), and go back and fix it. Do this again and again until it’s perfect!
Learning to create your own meshes is cool because you can create custom armors and outfits, like a cute outfit for Liara:
Or even replace entire characters – like an Emily Wong replacer for Diana Allers because Allers is terrible:
I’d love to see what you come up with! Be sure to post a comment here and share! :)
Go back to the main modding tutorial page and read more!


Thank you very much for this tutorial. It was a huge help!
I appreciate all of your hard work.
Greetings from Germany
Alex
Thanks Alex!! I’m glad you found it useful :) PS HOW MUCH DO I LOVE YOUR DEVIANTART PAGE!!!!
Yes it was very useful and you have no clue how long I’ve been searching for something like this but never found one (maybe I am too stupid ;) ), but then I came across your site and you was able to make me happy with this tutorial and you was able to put a huge smile on my face. Thank you! I can imagine how much work you put in this and every Mass Effect fan has to appreciate it. I LOVE your site! I hope you will never stop! :)
PS Aww thank you very much. This means a lot to me, but I have to say, I have still so much to learn. Thank you very much for your kind words!
Great tutorial, very well explained and extremely useful :) Just wondering, what is the name of the Ashley t-shirt mesh? I’ve looked at a few in ME3Explorer but not sure which one it is. Thanks!